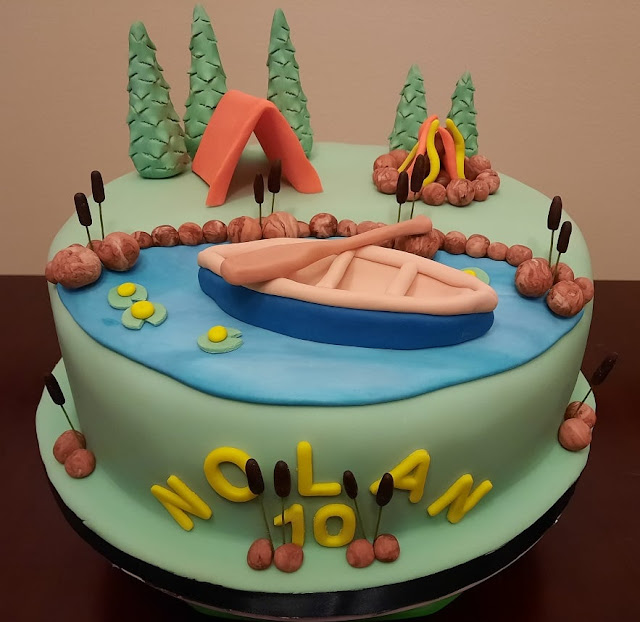
When I first started working with fondant, everything was new and honestly a little scary. How do cake artists make those cool 3D shapes? Well, I have a really fun and easy project for you today. Trees are a great project for beginners, can be made in many sizes, and work well on many different themed cakes or cupcakes!
After you make a batch of fondant (recipe coming soon), let it sit for a couple hours or overnight to harden a little. This will also allow your colors to blossom as well. You can do single color trees, or vary the color slightly between the trees to represent a forest. Store this fondant in a cool and dark place overnight. I make all of my shapes/characters with fondant; I do not use gum paste. I find that fondant is easy to use and shape and dries quickly enough for my needs.
Supplies: Click here to view my Fondant Supply list on Amazon.com. For page transparency: As an Amazon Associate I earn from qualifying purchases.
Large plastic board:
Fondant modeling tool set:
Instructions: Remember that fondant dries quickly, so only take out a small amount at a time, and keep the rest covered with plastic wrap.
1. Take a chunk of fondant and roll it between your hands until it is soft and smooth. We don’t want any cracks visible. You will need to have your powdered sugar/corn starch mix available as your hands warm up to keep the fondant smooth rather than sticky.
2. Once the fondant is rolled into a ball, continue rolling one side into more of a point so the final product looks like a traffic cone.
3. Use a fondant tool that has a pointed end (many in the tool kit will work) and push it up into the bottom of the cone. This will hold your tree while you begin to cut the branches.
4. Next, use your tiny sharp scissor, starting at the top of the tree and working your way down, creating tiny cuts with the scissor.
Spin the tool so that you can work in a circle. Do not cut more than a ¼ of the way into the fondant, and vary your cuts as you work your way around.
Lifting up slightly with the scissor will give the branches some “lift.” Wipe off your scissor with a damp wash cloth in between each tree to prevent fondant buildup and sticking.
5. Gently remove your tree from the fondant utensil, place it on your cutting board, and allow it to dry overnight!
6. To attach these trees to the cake, I typically use toothpicks. Gently spin ½ of the toothpick into the bottom of the tree and place where desired on the cake.
These trees are a simple and fast project that will add dimension to any project you work on. We are quite the outdoorsy family, so most cake requests have to do with camping or hiking or skiing or fishing. As you can see in this post, I’ve used these trees on many projects.
For my son’s 11th birthday, he requested a mountain cake. He had just finished the season on the ski team, so I thought it would be fun to make a Mountain ski race-themed cake with our local resort in mind. This cake needed HUNDREDS of trees!
Large plastic board:
Fondant modeling tool set:
Very small and sharp curved scissor:
Instructions: Remember that fondant dries quickly, so only take out a small amount at a time, and keep the rest covered with plastic wrap.
1. Take a chunk of fondant and roll it between your hands until it is soft and smooth. We don’t want any cracks visible. You will need to have your powdered sugar/corn starch mix available as your hands warm up to keep the fondant smooth rather than sticky.
2. Once the fondant is rolled into a ball, continue rolling one side into more of a point so the final product looks like a traffic cone.
3. Use a fondant tool that has a pointed end (many in the tool kit will work) and push it up into the bottom of the cone. This will hold your tree while you begin to cut the branches.
4. Next, use your tiny sharp scissor, starting at the top of the tree and working your way down, creating tiny cuts with the scissor.
Spin the tool so that you can work in a circle. Do not cut more than a ¼ of the way into the fondant, and vary your cuts as you work your way around.
Lifting up slightly with the scissor will give the branches some “lift.” Wipe off your scissor with a damp wash cloth in between each tree to prevent fondant buildup and sticking.
5. Gently remove your tree from the fondant utensil, place it on your cutting board, and allow it to dry overnight!
6. To attach these trees to the cake, I typically use toothpicks. Gently spin ½ of the toothpick into the bottom of the tree and place where desired on the cake.
These trees are a simple and fast project that will add dimension to any project you work on. We are quite the outdoorsy family, so most cake requests have to do with camping or hiking or skiing or fishing. As you can see in this post, I’ve used these trees on many projects.
For my son’s 11th birthday, he requested a mountain cake. He had just finished the season on the ski team, so I thought it would be fun to make a Mountain ski race-themed cake with our local resort in mind. This cake needed HUNDREDS of trees!


Comments
Post a Comment